Push-Up Progression: From Your First Rep to One-Arm Strength
Kinesiotherapist · Pilates Coach
The push-up is one of the most useful movements you can own. It builds your chest, shoulders, and triceps, and it teaches your whole body to stay stable and strong. The trouble is that people treat it as pass or fail, you can do one or you cannot. It is not like that at all. The push-up is a ladder, and everyone can climb it from wherever they start. Your body is your only investment, and this is one of the best returns it offers.
The form that protects your shoulders
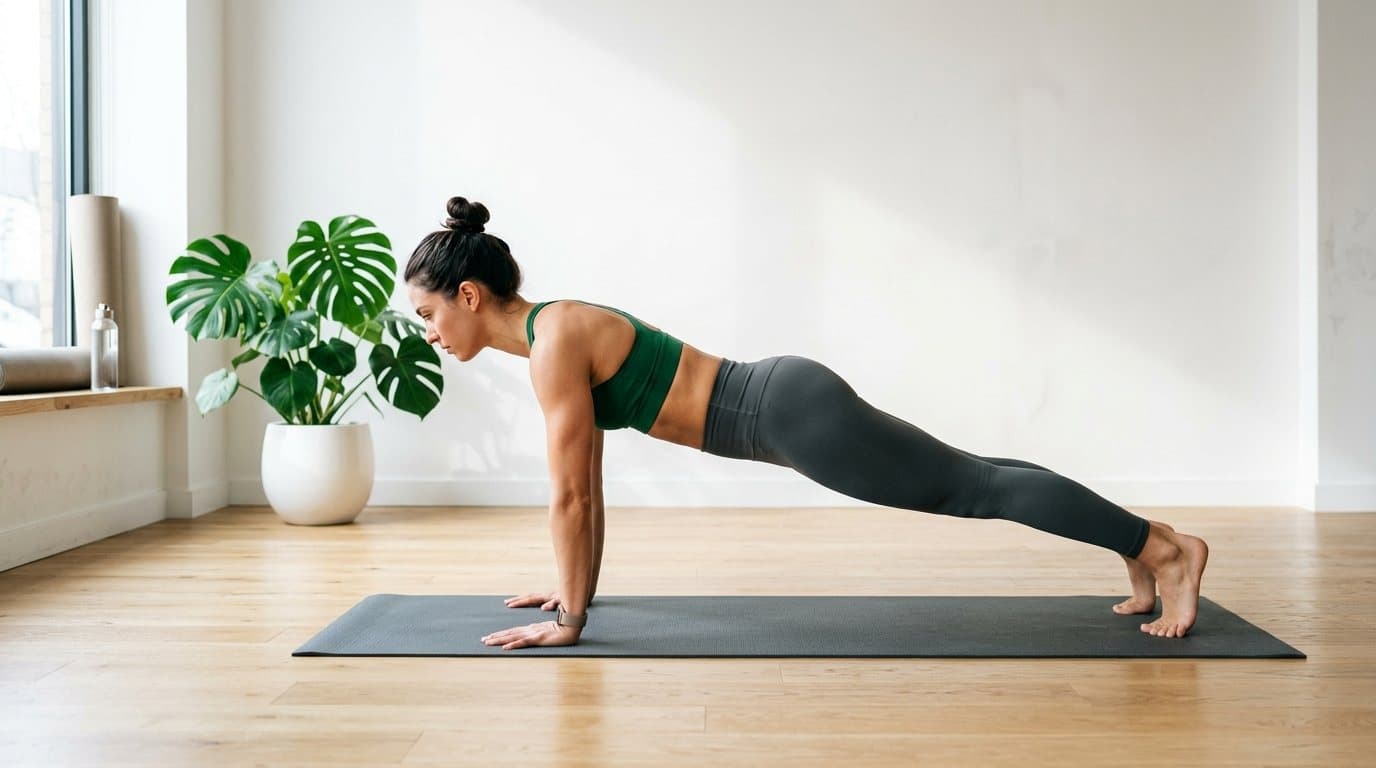
Before the progression, the cues, because doing push-ups well matters more than doing many. Set your hands a little wider than your shoulders. Imagine a straight line from the top of your head to your heels and hold it the whole time. Draw your ribs gently down so your lower back does not sag or arch. As you lower, let your elbows travel back at around a 45 degree angle rather than flaring straight out, which is kinder to the shoulder joint. Lower with control until your chest is just above the surface, then press all the way up.
Keep these cues at every stage below. The angle changes, the form does not.
The progression ladder
Work through these in order. Spend time at each level until you can do several controlled, good-form reps before moving on.
- Wall push-ups. Stand facing a wall, hands on it, and push. This grooves the pattern with very little load.
- Incline push-ups on a table or counter. The higher the surface, the easier. A sturdy kitchen counter is perfect.
- Lower incline on stairs or a low bench. Drop the surface gradually as you get stronger.
- Knee push-ups on the floor. Now you are pressing real bodyweight, just with shorter leverage.
- Full push-ups from your toes. The milestone. Keep the line, keep the control.
There is no rush. Most people who could not do a single floor push-up build one by patiently working down this ladder over a few weeks.
Knowing when to climb the next rung
The most common mistake I see is rushing, jumping to the floor before the body is ready, then sagging through ugly half-reps that build frustration rather than strength. So give yourself a simple, honest test for moving up a level.
| You can move up when... | Stay where you are if... |
|---|---|
| You manage ~8-12 clean reps | You can only grind out a few |
| Your body holds one straight line | Your hips sag or pike up |
| The last rep still looks like the first | Form falls apart partway |
| You feel in control of the lowering | You drop down rather than lower |
When all of the left column is true, drop the angle one step. When any of the right column shows up, you have found your current level, stay and earn it. There is no prize for skipping rungs, and every rung you master makes the next one possible.
Why you might be stuck
If a full push-up feels impossible, nothing is wrong with you. It is a high level of relative strength, and often the deep core and shoulder stability need building alongside the pushing muscles, which is why the body sags in the middle. Working the easier angles develops both at once. Adding some core stability work speeds things up nicely, because a stable middle stops the energy leaking out of your push-up.
Keep climbing past the full push-up
Here is what surprises people: the ladder keeps going well past a standard push-up. Once full reps are comfortable, you can:
- Elevate your feet to shift more weight onto your upper body.
- Slow the lowering to three or four seconds for more time under tension.
- Pause at the bottom for a breath before pressing.
- Widen your range with push-up handles.
- Progress toward single-arm work by gradually loading one hand more than the other.
There is genuinely room to keep getting stronger here for years, all without equipment, which is exactly why I love this movement.
Practice often, progress slowly
Push-ups respond well to frequent practice. Working them a few times a week, always with clean form, builds strength quickly. Pick your current level, earn several good reps, then climb one rung. This is the same patient method behind all of bodyweight strength training: make the movement a little harder over time, and let your body rise to meet it.
Save & share on Pinterest
Click any card to pin it — or share with someone who needs it.
Push-Up Progression: From Your First Rep to One-Arm Strength
A step-by-step push-up progression that takes you from wall push-ups to full reps and beyond, with t…
A step-by-step push-up progression that takes you from wall push-ups to full rep…
Read the full guide: Push-Up Progression: From Your First Rep to One-Arm Strength
Free fitness tools
Push-Up Progression: From Your First Rep to One-Arm Strength — use our free calculators for instant …
Pinterest opens in a new tab. You can edit the description before saving.
Frequently Asked Questions
How do I work up to my first full push-up?+
Why can't I do a push-up yet?+
What is the correct push-up form?+
How can I make push-ups harder?+
How often should I practise push-ups to improve?+
My wrists or shoulders hurt during push-ups, what should I do?+
Are knee push-ups effective, or am I wasting my time?+
About the Author
I'm a kinesiotherapist and Pilates coach. I help people move well and get strong without breaking down, from fixing a stiff back to building real strength using nothing but their own bodyweight.
View full profile →